NYC Century Takeaways from WE Bike NYC

century

Did you hear about or ride the NYC Century that happened in September? Have any questions or takeaways? One WE Bike volunteer Elyse Bejasa shares her thoughts on the urban century.

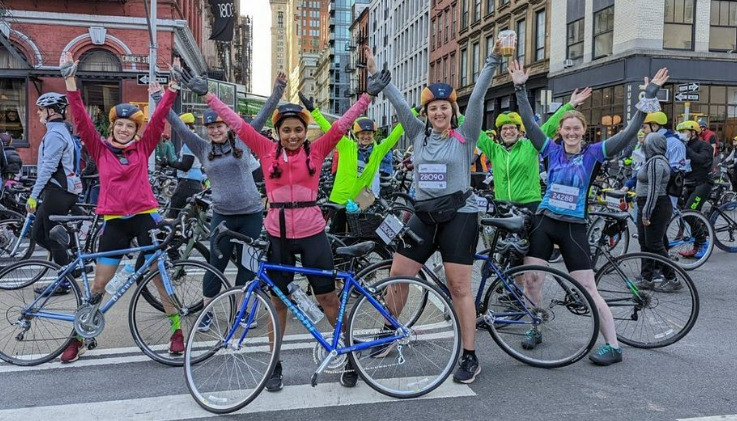
Thank you to Transportation Alternativesfor hosting the 2015 NYC Century on September 13th!! WE woke up early on a Sunday to explore the city with hundreds of other cyclists, taking well-timed breaks to refuel and riding through new areas. The tour, which has 4 options for distance, was a great opportunity for us to do an urban century, which many of us had never done before.

While some of us started in Central Park, my decision to start in Prospect Park was a no-brainer: I live about 5 minutes away. Still, it was hard to wake up at 4:30 am on a Sunday to get ready. My dog definitely gave me a look of “why are we awake at this hour??” But alas, I dragged myself out of bed, got dressed, turned on my bike lights, and met up with some fellow 100-milers in the Park.

A century is no easy feat, but TA made it easier with routes marked for each distance, helpful marshals, and DELICIOUS food at every rest stop. I think I ate 4 or 5 plums and all the watermelon I set my eyes on. And that hummus??

Riding an organized century was a different experience from other centuries that I have done. The biggest difference was that everything was routed ahead of time. It was very helpful to not have to constantly think about what turns to take, what the general route was, and where WE should stop next to take a break. It meant that I could concentrate on what was ahead of me: lots and lots of miles.

I was also lucky that I got to ride with a group of fellow WE Bikers who pace well with me. As much as WE all enjoy riding together as a group, it’s important to understand your individual needs when doing a long ride like a century. How often do you want to stop? Do you need to take long breaks between rest stops? Can you ride at a fairly similar and steady pace together? Luckily, my answers were YES and I’m glad I was riding alongside these ladies! Otherwise, I don’t know if I would have had as much fun.

I hadn’t originally planned on doing the NYC Century, but I’m so glad I did. Next up, riding the 40 mile route of the Tour de Bronx with WE Bike NYC!!

Beating the Summer Heat – tips from WE Bike NYC!!

By Meg Ausen


WE Bike to Jacob Riis Beach!

This heat wave, huh? For most of July we have existed in temperatures in the upper 90s and humidity upwards of 60 percent. We have pedaled past endless mountains of hot trash and found ourselves surrounded by countless numbers of buses and cars, each radiating enough heat to make us feel like we are baking in a kiln, while they drive out of the city to escape this stupid heat. July is behind us but August has only begun – how can WE beat the heat while simultaneously staying active on our bikes?

  • LIQUIDS! Liquids top the list. If your thirst is only quenched with a cool beverage, WE suggest putting your water bottles in the freezer the night before you ride. Or pop some ice cubes into your water bottles before heading out the door. Also try adding some cucumbers, mint, basil, lemon verbena, ginger, chamomile, pineapple, watermelon, lemon/lime, etc etc etc for a refreshing twist! Drink LOTS and often. Add some electrolytes into the mix, because you lose a lot of those in this kind of heat and they are vital to your body’s performance.
  • Moisture wicking fabric dramatically alters a cyclist’s comfort level in hot temperatures. Particularly in high humidity, staying dry helps with your body’s cooling process. Body temperature regulation becomes more important at the extremes which is why this fabric is so helpful. If you are not able to get your hands on some moisture wicking fabric, wear loose fitting and breathable materials. Breathable materials are important for every body part you cover, including your seat and your crotch. Saddle sores often become more common when your skin doesn’t have the chance to breathe, and nothing ruins a ride like a saddle sore (or several)!
  • Cover up! This may sound counterintuitive, but with the right fabric, covering your arms and back can help. Not only does it protect you from a sun burn, but prolonged exposure to the sun increases the chances for sun stroke and heat exhaustion. Talk to someone at your local bike shop for recommendations for long-sleeved jerseys or consider a pair of sun sleeves.
  • Get off your bike and take more breaks. This takes some advanced planning so that you can still get from point a to point b on time, but WE suggest dismounting more often and finding shade (multitask: this is also a great time to drink fluids) more often during the summer. If you can, get into some air conditioning while dismounted.

Other Ideas:

  • Accessorize with a cold, wet bandana around your neck and/or under your helmet (if it fits comfortably under your helmet).
  • Wear sunglasses – the sun and wind tires our eyes!
  • Reapply sun screen often.
  • Put your bike clothes in the freezer prior to putting them on for a ride.

We often find ourselves in discomfort or pain when it’s too late. By following these tips you can prevent the heat from ruining your day and continue to enjoy your ride! Have ideas of your own? Please feel free to post on the Female Bike Forum presented by WE Bike NYC.

WE Bike NYC’s 2nd Rapha Women’s 100k Ride!

Getting Ready For This Year’s Rapha Women’s 100 Challenge — from WE Bike NYCer and co-leader of the Rapha Women’s 100 Elyse Bejasa

Early last summer, I stumbled across the WE Bike NYC website and saw that they were hosting a ride for the Rapha Women’s 100 challenge. At that point, I had been a bike commuter for about 11 months, riding 5 miles to and from work on my old, clunky 3-speed cruiser. The longest ride I had ever done was the TD Five Boro Bike Tour a few weeks prior, but I wanted to challenge myself with the 60 mile ride. I didn’t know what to expect and was pretty ill-prepared for the ride, but with the support of the amazing women of WE Bike NYC, I finished. All 60+ miles. On my cruiser. I honestly don’t know how I did it without my legs falling off.

This year, I feel like I’m ready for the Rapha Women’s 100 because I’ve learned SO MUCH since last year and because I’ve biked way more than I ever have. So I figured I’d share a few of the things I’ve learned in my quick transformation from commuter to cyclist that’ll help me get through those miles on July 26th.

  • Bring snacks and EAT THEM! I usually have snacks on me (I’m a hungry person), but it never used to occur me to me that I needed to be eating fairly often while on my bike. Biking burns a lot of calories and it’s easy to miscalculate how much energy you’re expending until you’re just about to bonk. I found that I need to eat something (usually a pack of energy gummies or a KIND bar) every 20 miles to stay steady. The amount of energy you need varies person to person. How your body reacts to heat and humidity and other extraneous factors also play a part in this equation. That said, I often carry more food than I think I will need because I would rather be safe than sorry. If I cannot physically carry enough food for my ride, I will bring enough cash and plan my route accordingly so that I have places to refuel along the way.
  • Riding in groups is VERY different from riding alone. For one thing, it’s more fun. But it also requires communication between riders. I learned about the various hand signals and audible cues that cyclists use so other cyclists are aware of what’s going on. Good communication between riders helps people trust that the group is looking out for their safety. So ride predictably and pass back signals when you’re riding in a group.
  • Hydrate. Hydrate. Hydrate. Hydrate. Hydrate. Did I mention HYDRATE? It goes without saying that water is the best, but remember to add electrolytes to replenish the ones you lose as you sweat over a long period of time.
  • Don’t be afraid of bike gear! As much as I can, I try to use what I already have when it comes to gear. But as I began to do longer rides and ride more often, I realized upgrading was in my favor, procuring different gear as I was able. I went from casual commuter to cyclist because I was looking for gear that would make my rides more efficient. Whether it was cycling jerseys (the pockets on the back are magical and hold snacks!), chamois shorts (protecting our bottoms doesn’t just mean more comfort – it’s also better for our health), or clipless pedals, I invested in them because they make my ride better for me and also because I knew I’d wear them pretty often.

I’m glad to be co-leading the Rapha Women’s 100 ride this year. If you have any tips or tricks you’d like to share, if you have any questions about the ride, or just want to chat about something bike-related, please feel free to post on the Female Bike Forum presented by WE Bike NYC.

Hope to see everyone on July 26th!!

Saddle Advice from WE Bike NYC!

By Meg Ausen

With Bike Month and our first miles of 2015 behind us, some of you may be in need of some fine tuning to your bike, particularly for your behind! Seat discomfort getting you down? Read on for some ideas and tips for a better ride.

Bottom’s Up – Choosing the Right Saddle

Speak with any female cyclist about her bike and eventually the topic of saddles will come up. Or simply peruse our Female Bike Forum to find such discussions (there’s tons of literature out there on this topic). But, if you’re like many women, you always come away from those discussions with more questions and maybe some uncertainty and confusion. So what’s the secret? What are WE going to tell you about the right fit that is going to blow your mind and ease possible everyday woes of riding a bike and experiencing discomfort?

If you’re looking for all of your saddle-related problems to be solved by the end of this article, hoping to know exactly what saddle is best suited for you, you will be disappointed because, guess what? It’s different for everyone and like so many aspects of riding a bicycle the perfect saddle is personal. BUT!! WE want to provide some insight and tips on how to get from Point A of “Why is having a good saddle important?” to Point B of “I’m ready to ride to outer space because it feels like I am pedaling a cloud!”

What is the Queen of Women’s Bicycle Saddles?

To find the proper saddle, you will need to first determine how much money you are able to spend and how much time you’ll be spending on your bike. You can certainly find a saddle that suits you at an affordable price. If you are going to invest money into your bike, however, a good saddle is one of the best places to start. Remember that there are three points of contact between you and your bicycle: your hands, your feet, and your seat. That means we distribute our entire weight across those three points of contact, with most of that distribution centered on your seat. Not only can the wrong saddle be uncomfortable, but the more time spent on it can eventually translate into health problems. WE highly suggest going to a bike shop to get measure your sit-bones (alternatively, you can find YouTube videos on how to do this at home) because your measurement is the first threshold for finding the right fit. This is even more important if you spend a lot of time on your bike!

Once measured do some research, integrating other factors like weight, height, health history, etc. into your search. Ask yourself and others lots of questions! One thing the majority of people recommend for women is getting a saddle with a cut out, as the space alleviates some pressure on sensitive parts and the added air flow also provides relief. Next you are ready to test saddles. When going through the testing phase, recognize and accept that it might take some time to find the right saddle – you may not walk into a shop and walk out with the right saddle on your first try.

To narrow down the seemingly endless choices of saddles, WE asked for some feedback about what saddles women around NYC use and recommend. Here they** are in no particular order:

  • Selle Italia Gel Flow Lady — this is a lightweight saddle made with a nylon shell. It has a large cutout in the mid-section for comfort as you ride. It also has gel inserts and extra padding (which cancels out a lot of road vibration), yet is still a narrow saddle making it ideal for longer rides. Retails for around $150. For a similar saddle, see Selle Italia’s Diva Gel Flow saddle.
  • Terry Women’s Butterfly TI Gel — this saddle is wider in the rear and is designed for endurance and distance riding, but is comfortable for any length of ride. It has a large cut out through the nose and mid-section and it has multi-density injection molded foam that is slightly stiffer in the rear for more power while pedaling. The saddle has a black textured leather cover. Retails for around $164.
  • Specialized Women’s Road Riva — this saddle is from a couple of seasons ago, but is still available online. This saddle has a cut out in the mid-section and foam padding. The saddle has Specialized Body Geometry ergonomic design that minimizes pressure. It also has a waterproof top. Retails for around $35.
  • Specialized Ruby Expert — this saddle is designed for competitive riding. It is ultra-light with thin yet supportive gel insert padding and has a carbon reinforced shell. It has a water resistant shell and a cut-out in the mid-section. Retails for around $130.
  • Brooks Ladies B17s — this saddle is made of leather that over time molds to the shape of your body. Ideal for long distance touring and everyday use. Brooks saddles have a break-in period of a couple hundred miles since they are leather (there is no padding), but once broken in, fit like a glove. If properly maintained, Brooks leather saddles last for decades. Retails for around $150.
  • Brooks Cambium C17s — Brooks recently came out with this women’s saddle made from vulcanized natural rubber and organic cotton. These saddles have a thin layer of structural textile and, unlike the B17, a waterproof top. Retails for around $150.
  • Planet Bike Women’s A.R.S Saddle — this saddle has a full length recess down its center and is suited for a cruiser or commuter bike. It has padding and a soft Lycra cover. Adding to its comfortable design is a flex support base. Retails for around $30.

Bike Month! WE Bike to Work!!

Today is the official kick-off to National Bike Month and the 2015 season. Now that the trees are budding, the flowers are blooming and the days are longer New Yorkers are beginning to crawl out from underground and emerge from hibernating in their apartments all winter. Looking to enjoy the weather and improve your mood by commuting to work? Wondering what you’ll need to pack for your commute? WE Bike NYCer Elyse Bejasa asked some women to share their tricks and tips for commuting to work – thanks Elyse!

Commuting By Bike: What to Pack?

My commute to work is one of my favorite parts of the day. I’m outside on my bike, enjoying the city on two wheels, getting some exercise, and not spending $2.75 to get stuck between stations or hear that there’s a train two stations away (is this ever true?). But one of the most cumbersome parts of bike commuting is knowing what to pack. Overpack and you’re riding with an unnecessarily heavy load. Underpack and you might get stuck in a situation where you don’t have what you need. What’s a commuter to do?

WE asked a few WE Bike NYC commuters to share what they pack on their commutes and tips to keep in mind when packing.

THE STANDARD

Change of clothes for work: Most of us work in environments where bike/workout clothes aren’t work appropriate, so we either bring a change with us or have clothes already at our offices. Socks, underwear, and bras also get packed when we think we might need a change when we get to work.

Baby wipes and deodorant: Depending on the length of your commute and the weather outside, you may get to work sweatier than you’d like to be. If you don’t have access to a shower, these help freshen you up so people won’t mind sitting next to you during meetings.

“Bike bag”: We all kinda-sorta carry some sort of bike bag. Usual contents include: tire levers, extra tube, bike lights (if they’re not already mounted to your bike), small pump/CO2 tube, patch kit. Whether it’s in our bags, on our bikes, or wherever, these things can come in hand on your commute when you least expect it. Most shops aren’t open in time for the morning commute so it’s great to have these things accessible if you don’t have time to wait for the nearest shop to open. But if you do find yourself in a bind, you can always locate a BikeStock vending machine and get what you need to keep going.

Lunch and snacks: A long commute can lead to a hungry (read: CRANKY) cyclist. Keeping snacks in your bag can help alleviate that (bars like CLIF, Kind, etc.). Nuun tablets during the summer help re-hydrate after a sweaty commute. If you bring your lunch to work (like me!), remember that it can take up a fair chunk of space in your bag, so if you’re buying a commuter bag, keep this in mind.

Bike lock: Most of us are lucky to get indoor bike parking in our buildings, but even so, it’s always a good idea to carry a lock. You never know when you’re going to need it.

Etcetera: Medicine/makeup bag (includes things like Chapstick with SPF, face and/or hand lotion, and sunscreen); essentials (wallet, phone, keys); phone chargers, headphones.

SOME TIPS
  • If you find yourself switching between bags pretty often, keep things in separate pouches so it’s easier to transfer between bags.
  • Leave things like extra lotion, baby wipes, deodorant, etc. at your desk as necessary.
  • If you have a rear or front rack, consider riding with panniers or with a bag strapped to your rack by bungee cords.

ELYSE

THE COMMUTE: 8 miles, Crown Heights to Chelsea
THE JOB: Fundraising at a nonprofit
THE BAG: Timbuk2 Custom Commute Laptop Messenger Bag. I love this bag because it is pretty large (and can expand as necessary), has plenty of pockets for keeping things organized (including an exterior pocket on the side for easy access), is weatherproof, and was designed with commuters in mind. Having a big bag also means I don’t necessarily have to eliminate things when I’m deciding on what to pack and I like to be prepared for anything. I also chose bright yellow to help with visibility.

ELIZABETH

THE COMMUTE: 9 miles, Murray Hill to Washington Heights
I am not an everyday rider, but I am working my way to more frequent commutes. I don’t mind cold, just ice, so that inhibits me. Several times a week and I’m happy. Would be nice to eliminate the MTA completely, but it’s not a reality for many reasons.
THE JOB: Public Librarian
THE BAG: When I had a folder bike I used Ortlieb panniers, but much of what I carried then I just leave at work now, so just use a simple, light non-bike specific Nike backpack.
During the summer, on rare occasions, I can travel with a jersey and just squeeze my keys, phone cables, change of sports bra/underwear into a large bottle and put them on the bottle rack. Sounds gross to put clothes in a bottle, but only when they are clean. I sometimes leave them at work until a back pack day or train day. I have a full wardrobe of old clothes at work along with soap, wash cloth and towel and toiletries in my locker and desk drawer.

EVO

THE COMMUTE: 4.5-5 miles, Park Slope to Lower Manhattan
THE JOB: Trading at a mid-size firm
THE BAG: I carry less and less because I hate carrying all that stuff on my back. Sometimes I even leave my clothes at work and just wear the same thing for several days at a time, and just switch out my bike clothing at home for washing. No one notices.

I use a messenger bag or a small backpack. I tried using a hiking pack once and that wasn’t good – the top of the pack (which was hard to keep the pack rigid) kept hitting the back of my helmet and made for a very uncomfortable ride. The messenger bag (once I got used to it) is nice because it can fit a lot if I need it to. Even so, I’m always on the lookout for more back-ventilation friendly bags.

MEG

THE COMMUTE: 10 miles, Washington Heights to TriBeCa
THE JOB: Due Diligence and Strategic Research
THE BAG: One Ortlieb Back-Roller Classic Pannier. Carrying anything on my back while I bike quickly brings on lower back pain, so I love having panniers for my bicycle racks. My Ortliebs are completely waterproof so if I decide to commute in the rain, I know all of my things inside won’t get wet. Also, one pannier is 20 liters, so it can hold a lot! I carry all the essentials for a simple bike fix, lock and lights. I also bring a change of clothes, a makeup bag, and breakfast/lunch. When packing up my pannier, I use tote bags to keep my clothes separate from things like my wallet, daily planner, etc. That way when I arrive to work I know that one tote has everything I need to get ready and I can leave the other stuff at my desk. I’m lucky to have a shower at my company so I keep things like a hair dryer, hair brush, shampoo and conditioner all at my desk.

COURTNEY

THE COMMUTE: 16 miles, Clinton Hill, Brooklyn to Fordham, The Bronx
THE JOB: Business Advisor
THE BAG: Avon tote bag attached to my back rack with bungee cords from the discount store. I’ve actually had the bag for years but have recently fallen in love with it because it exactly matches my Torch illuminated helmet (I like to coordinate).

On this day, I actually took my bike on the train because I wanted to ride home from work in the good weather. Because of the distance (and three bridges), the economy of weight and bulk is especially important for me. So on bike-to-and-from-work days, I have to carefully choose my professional clothes for the day. I try to choose work outfits that are loose or stretchy (like a body con dress under a simple black skirt) to avoid winkles, and bike outfits with thin but effective layers so that they fit in the bag with my helmet, lunch, Kindle, and essential equipment. Chargers are also a must because I am still trying out new routes and cannot afford to run out of juice for my Google maps 3 boroughs from home!


Despite our different routes, jobs, and gear, WE all agree that getting to work by bike is the best way to commute! Ride safe!
Tips on Getting Ready for Bike Season!

By Meg Ausen

Happy March Everyone!With daylight savings around the corner and spring approaching, it’s likely that WE are all chomping at the bit to get back on our bikes after a cold and slippery winter. In preparation for hitting the pavement, WE have some ideas for exercises to prep your body for the upcoming cycling season. Remember to always be safe and if you have certain health issues, modify or avoid any exercises that will aggravate pain or cause injury. If you have any questions about how to perform any of the below exercises, it’s best to consult a health professional!

Core
Core strength is essential for cycling, particularly if you are riding longer distances. Your core creates the platform for pedaling, so working naturally having strong core muscles will translate into stronger pedaling. Not only will the following exercises strengthen your core, but you may see improved posture as another benefit – a strong core helps alleviate lower-back pain that is often associated with cycling. One of the pros behind these exercises is that you can do them from the comfort of you own home. For an added bonus, add some weights to your routine.

  • Planks – planking is one of the best movements a cyclist can do. Try side planking if you really want to make your core work.
  • Crunches – crunches target both your abdominals and your hip flexors.
  • Leg Raises – the benefits of leg raises are many – besides targeting and strengthening your core, leg raises work hip muscles, thigh muscles, quads and your back!

Legs

A no brainer, keeping your legs in shape is essential for having the strength to pedal yourself from point a to point b. Like the core exercises listed above, the following exercises can be performed from the comfort of your own home – no need for forking out the money for gym fees if you don’t want to!

  • Squats – squats are considered a powerful exercise for cyclists, targeting the hamstrings and glutes, some of the key muscles for strong cycling.
  • Lunges – targets many of the most important pedaling muscles, including the calves, hamstrings, and glutes. Mix it up by throwing reverse lunges into your routine.

Yoga

Try to introduce some yoga into your schedule. Aside from helping to alleviate stress (really important for New Yorkers!), yoga can be extremely beneficial to cyclists. Cyclists often have really tight hips, shoulders and hamstrings, and yoga can open those back up and correct some muscle imbalances.
If practicing at home, here are some recommended poses for cyclists

:

  • Cat/Cow – this pose brings length to your spine in both forward and back bends, working out stored tension from cycling.
  • Downward Dog – this pose will help to open your lower back simultaneously strengthening it, which will help provide structural support when you’re on your bike.
  • Chair Pose – this pose helps to both strengthen and open up your lower back and hips. It also helps to lengthen the upper spine.
  • Sacrum Stretch – this pose opens up the entire spine, particularly the sacrum which is located at the base of the spine.

If you want to pay for classes, the options for yoga studios in New York city are endless. Do some research for studios that suit your needs, but here are a few suggestions:

  • SYNC Studio – this is a joint cycling/yoga studio in Williamsburg.
  • Third Root Community Health Center – a community center in Brooklyn centered around social justice. Offers yoga and alternative medicine.
  • Yoga to the People – with locations all around New York City, this studio is a welcoming and affordable way to find out what type of yoga is right for you.

These exercises are helpful to us all year long, but building a routine as WE wait for spring will pay off when you are ready to get back on your bike for the upcoming season! Do you have any other ideas? Feel free to post them on WE Bike NYC’s Female Bike Forum!

Event Spotlight: Get ready to ride the 5 Boro Bike Tour with WE Bike NYC!!


5 Boro Bike Tour Team 2014

With warmer climes coming, WE here at WE Bike NYC are getting ready for longer rides, tours, and generally biking more! The TD Five Boro Bike Tour on May 3rd is a great way to ride your bike 40 miles around New York City on roads closed just for cyclists!! And lucky for you, WE Bike NYC has a team of riders you can join! If you’re interested in joining, email events@webikenyc.org for more information.

Here are some tips for training for this year’s tour:

  1. Train Indoors: During the colder months, it’s hard to get outside and train on your bike. But there are plenty of indoor options for you to consider, including indoor trainers (at home, at the gym) and spinning classes. Focus on your pedaling technique and work on strengthening your legs.
  2. Start a training diary: When you are able to get out on your bike, record your progress so you can review and monitor how you’re doing. Things that are useful to record are the time of day, temperature, wind, mileage, average speed, elapsed time, how flat or hilly the course was, and how you felt during the ride.
  3. Cross train: Try yoga, running, or lifting weights to build up stamina and strength. Climb the stairs instead of taking the elevator. Walk a few extra blocks to the express stop of your subway line or opt to walk instead of taking the train. Do some exercises while you binge watch your favorite Netflix show. Take your dog out for a long walk on a nice day. Be creative and make it part of your daily routine!
  4. Find a buddy!: Even if your friend isn’t doing the Tour with you, it helps to have someone to motivate you to get up and do something. Find someone who has a similar schedule to you who you can meet up with and train together. Can’t think of anyone? Post on the Female Bike Forum and someone’s bound to join you!
  5. Rest and recover: Rest days are just as important when training. Give your body and mind a break to avoid over training. Biking should be enjoyable and fun!

And most importantly, enjoy yourself!

Curious about a Multi-Day Bike Tour?

WE Bike NYC is all about “creating a community of women who bike.” No matter what level you are at, there is always someone a little bit further along who can mentor and support you, whether you are trying to get more comfortable in traffic, go your longest distance ever, or start biking at a competitive level.

Ruby Gertz and Sarah Wilson, two WE Bikers planning their first cross-country cycling trip for spring of 2015, recently connected with Megan Ausen, another WE Biker who biked from Washington DC to San Diego last year. Ruby interviewed Megan about her trip, and WE wanted to share stories and tips from Megan’s epic journey for those also curious about long distance bicycle touring.

Ruby: Tell me about your tour.
Megan: My friend and I started in Washington DC and biked west all the way to San Diego over 9 weeks, starting in March. We loosely followed the Adventure Cycling Association’s Southern Tier maps. We knew each other from college, and we planned the trip in about six weeks.

Ruby: What kind of bikes did you ride?
Megan: We did a lot of research and talked to a lot of people, and both ended up getting a Surly Long-Haul Trucker. We wanted to get a really durable steel-framed bike that was constructed simply, so that if there were any major breakdowns it wouldn’t be really hard to fix. It was a big up-front cost, but my friend worked at a bike shop so she was able to get us both bikes with her employee discount (which was a huge help!).

Ruby: Your tour was unsupported, meaning there was no support vehicle or tour guide. Where did you spend nights, and did you feel safe?
Megan: We used a variety of resources: we camped, we stayed in churches, we stayed with friends (if we were lucky enough to know someone) or even second-third-fourth connections. When you do a really long tour, we found that people were really intrigued and wanted to reach out and open up their homes to us. Sometimes we would call the Chamber of Commerce in whatever town we were in and ask if they had any ideas for where we could stay that night — it was a lot of day-by-day planning. We stayed in a fire station, we stayed in someone’s business, basically anywhere with a roof over our head. Sometimes we would stay in motels but we were on a budget, so we tried to live as cheaply as possible. There’s also a really great website called Warm Showers, which is like Couchsurfing but for touring cyclists exclusively. We felt safe everywhere we stayed, but we had discussed beforehand that we would always make decisions together and stick together, including decisions about safety. In general though, we found that everyone we stayed with was very nice and genuinely curious about what we were doing and wanted to help us out.

Ruby: Describe your best and worst days of the trip.
Megan: The best day was when we finished the Natchez Trace Parkway — it’s a stretch of parkway that beings south of Nashville, TN where no commercial vehicles are allowed. It was really quiet, relatively flat, and really peaceful. When we first started, it was the end of March and still cold and dreary but in the three or four days it took to cross it we really saw the changing of the seasons, and it became spring and warm. There was a lot of natural beauty in this part of the country. The worst day was in Texas, when we were leaving a town called San Angelo. We were heading northwest and there was an extreme headwind of about 25mph. It was like a blast in the face of this hot wind, and it was like 94 degrees. I remember this stretch of open field with no tree cover to block the sun or the wind, and I looked down at my bike clock and it was hovering around 5mph, 6mph. We stopped at several points and I just did not want to go on, we finally ended up getting a ride with some people at the end of the day because we were running out of daylight and we were still trying to make it to this town that was about 20 miles away, which by car is no big deal, but in that type of weather condition would have taken us 3-4 hours by bike. I felt really defeated that day, battling both the winds and the extreme heat. It was the hardest day.

Ruby: Would you do a long bike tour like this again?
Megan: Definitely!

Ruby: Would you do anything differently?
Megan: First of all, go west to east! We went east to west, and the winds were just really hard. I would also like to do more of a northern route. I’m glad I got to see that part of the country, but it was very desolate and very hot. Also, the maps we were going off of were about two years old, and so places that were listed as rest stops weren’t always there anymore, so that was a safety issue in terms of where we could find water and shelter. In my situation, I also probably should have gone with a different person. Our planning was very quick and at the time I didn’t know anybody else who would want to do a cross-country bike tour — so my options were limited.

Ruby: What tips would you suggest for choosing a ride partner?
Megan: If you’re going with a friend, just make sure you have those really hard discussions before you start. Just those really nitty-gritty things. If you’re not in such close quarters with someone, you might not bring up those small little things that bother you, but you’re going to be in very close quarters on your tour, so those things will end up really bothering you. For example, I didn’t like Texas, and my friend loved Texas, and this created some friction because I wanted to get out ASAP and she was loving every mile of it. Make sure you can handle being with this person, because you’re fully dependent on this person for not only your physical safety, but also as your emotional cheerleader.

Ruby: Did you learn anything surprising on the trip?
Megan: I had lived in New York for 3 years before doing this trip, and my faith in the greater good of people had worn thin. I expected to always feel unsafe and always be on my guard, but the trip totally restored my faith in humanity! Everyone was very nice, everyone was very kind, everyone was very helpful, and always curious about what we were doing. People would drive by us and ask us if we needed anything, pass us bottles of water, just really nice stuff. I had never done any smaller weekend or week-long tours before, so this was definitely the most difficult bicycling I’ve ever done. It really tests your physical limits and mentally, and just keeping a positive attitude can be more difficult than spending two hours climbing mountains (which we definitely did!). My mantra that I took away from the trip was “if you keep pedaling, you will eventually get there.”

Ruby: What advice would you give to other women considering cross-country or long-distance bicycle touring?
Megan: I would say, first and foremost, don’t doubt yourself. I think that every person is capable of doing more than they think they can. You can do it! I also think it’s important to have good equipment. Everyone is different, you don’t have to use the same bike and gear that I used, but make sure that you are comfortable on your seat in particular, and that you have a good fit for your frame. If you’re miserable on your bike, that’s going to affect your tour and it could affect your health later on down the road. Do a fitting before you leave, and pump up your tires, lube your chain, do all those really small things to prevent major break-downs while you’re out on the road.

Have any sage advice from bicycle trips of your own? Let us know on our Female Bike Forum!
(This group is different from our Facebook Page, and is for women, female-identifying and gender non-conforming people only– to engage with each other, build community, and talk about all things bike!)

WE Bike NYC’s Hot Summer Weather Tips and our 100k Rapha Ride!

As we approach that infamously unbearable first week of August, WE wanted to share some of our FAVORITE HOT WEATHER RIDING TIPS that helped us through this super long ride!

  1. Replace your backpack with PANNIERS, which attach to a back rack and can hold all of your things away from your body! It’s hot enough with just the sun on your back. If you’re really committed to riding with a backpack, try sticking an ice pack inside towards the part that rests on your back.
  2. Dampen a handkerchief or cycling cap and FREEZE it overnight! The cold fabric will melt against your skin as you ride and cool you off! You might be a little wet and soggy after, but at least it will be water and not sweat.
  3. Get a light-colored HELMET with lots of vents! Those bucket-like skater-style helmets are super cute for fall, but they trap heat against your head in hot, muggy weather and can contribute to making you miserable. Also, black helmets are like black cars- they will absorb heat from the sun faster than lighter colored ones.
  4. DRINK TONS OF WATER. WE sweat more in the summer, and want to avoid dehydration or heat exhaustion. Get a second water bottle cage to hold a spare bottle, and remember to take a good hearty swig at every red light!
  5. HYDRATION POWDERS are your friend! They’re basically little packets that you can add to water to turn it into an electrolyte drink, like Gatorade but without all of the sugar! Get more from your water by carrying these with you on long rides!
  6. ALWAYS BRING SNACKS. Sometimes the heat can diminish your appetite, but it’s important to make sure your body has the calories it needs to keep burning energy while you’re on your bicycle. Peanuts, bananas, fruit, and other foods with natural sugars and protein will help keep you going!
  7. Look for clothing with MOISTURE-WICKING properties. Lots of athletic clothing these days is designed to help carry sweat away from your body. Just check the tags to see if the items you’re thinking of purchasing are made of these special materials!
  8. Get a pair of CHAMOIS SHORTS and never wear denim short shorts in the saddle ever again (at least for those epic rides)! Padded shorts intended for cycling are about a hundred times more comfortable than regular summer shorts. Especially for long rides, chamois shorts will never ride up, bunch, or chafe against your legs and crotch. It is definitely worth the investment!
  9. Try an anti-friction CHAMOIS CREAM to minimize sweaty friction around your nether-region… spending long days in the saddle combined with sticky sweat can result in painful chafing and saddle sores, and products like this are designed to reduce friction and discomfort!
  10. Cut the sleeves off of your tee shirts! Opting for sleeveless, spaghetti-strap, or racer-back style tops will give more room for air to move around your armpits, because it always stinks (literally…) to ruin a favorite tee with big pit stains!