Get Ready to Bike to Work this Spring!

By Joanna Giordano

If you have the goal to start bike commuting, start planning now! Let’s say you can ride, but you want to step it up from occasional rider to commuter. This is a great goal! You will ride more, save money, and get the wind in your hair!

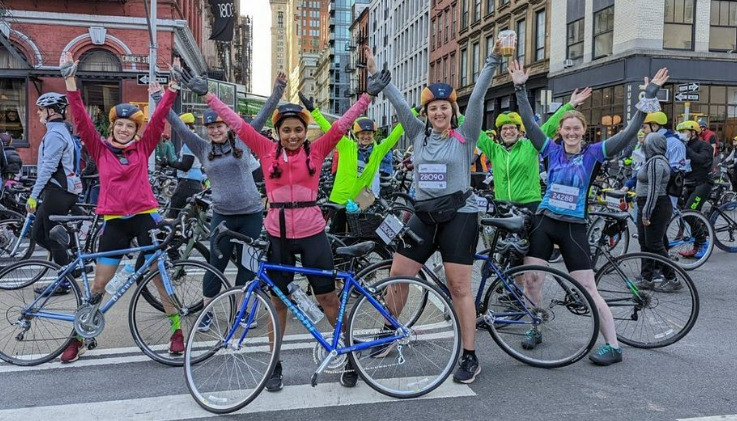
Here is a rough guide ramping up to May 19th – National Bike to Work Day.

What to do now:
1. Get your bike ready to go. Got your bike and helmet? Bells, lights? Have you had your bike tuned-up at a local bike shop so you know you can depend on your trusty steed?

2. Map your route ahead of time! Be sure to plan for there AND back since you will probably follow different routes and traffic directions. Don’t forget to assess the mileage, bridges, elevation in case you need to work up to it!
Check out the route turn by turn on the Google map bike option:

  • Walk part of it while imagining you are riding
  • Bike part or all of it on a weekend. Hop off and walk if you are ever unsure or uncomfortable. Instant pedestrian!
  • Notice construction, pinch points, potholes, tough turns

3. Things to look for at your place of work:

  • Does your work have a bike room? How will you get there? If it’s in the basement, you may need to use an alternative entrance.
  • If you have to lock-up outside, scope out the area to assess security.
  • Thinking that you’ll take Citi Bike? Where are the nearest docks to your office? Have a back-up in case your preferred dock is full or empty during your commute time.
  • Can you change/shower at work? If not, is there a gym near your office you can use? Or maybe moistened wipes will work for you, or you’re okay with just sweating and glistening?

4. Review your street riding basics:

  • Always ride with traffic. Never on the sidewalk. Not with headphones (only 1 ear is legal).
  • Stop at lights and before the crosswalk. Not in or on it.
  • Review a pedestrian style turn.

April – Time for some dry runs

1. Practice, practice, practice

  • Ramp up your distance, if needed. Practice in the park or use your route to train when not commuting.
  • Practice dry runs (part/whole) until you feel comfortable with the route and distance

2. A true dry run

  • Dry run your entire commute round-trip.
  • Leave yourself plenty of time so that there’s no need to rush.
  • Note the approximate time taken. It will probably never take longer than that!

May – It’s go time!

Are you ready? How’s the temperature these days? How are those dry runs feeling The day before your first bike commute:

  • Plan what you will wear and how you will pack your stuff. Basket, pannier, messenger bag, backpack? Whatever you choose, don’t dangle your purse from your handlebars!
  • Check the weather forecast. Many people are all-weather cyclists but no need to be a hero if you don’t want to ride in the rain.
  • Will you wear workout clothes and change at work? Don’t forget your bra! It happens to the best of us.
  • Will you bike tres chic in your skirt and heels? This is certainly doable, but you may want to practice it a bit first.
  • Will you bike home too? You can always split it up and bike in, subway home one day and the next morning: subway in, bike home.

May 19 – Bike to Work Day has finally come!

  • Leave early. Bike to work!
  • Leave plenty of time since it is an event and the roads may be more crowded with other newly minted bike commuters, like yourself. Give everyone space!
  • Maybe you’ll have time to stop if there is a promotional handout – yum!
  • Celebrate your accomplishment!

Good luck and we hope to see you in the bike lanes!

Have any other commuting tips or tricks to share? Join in the conversation in our Facebook group!
How to Dress for Biking in Colder Weather

By: Maria Boustead

The shorter days, the crispness in the air, the pumpkin spice everything…we all know what it means. Fall is here and winter is around the corner. Yes, the weather is getting cooler by the week but that doesn’t mean that your 2016 biking days are over.

The pleasures of biking through fall and winter are numerous. Fall, with its stunning colors, makes biking through the city’s parks and neighborhood streets a true joy. Winter may lose some of that brilliance but I find the tranquility of the quieter parks and (some) streets to be similarly rewarding.

Not being sure of how to dress for the colder temperatures is a common reason people give for not biking through more months of fall and winter. This is a topic WE’ve seen come up frequently on our Facebook Female Bike Forum, so we’ve culled those discussions for some head to toe suggestions of how to dress differently for fall and winter bicycling:

Head

You may already be wearing a riding cap, but as it gets cooler, opt for a fleece or merino wool cap to keep your head warm. They’re thin enough to comfortably wear under your helmet – although you may need to make a simple adjustment to how your helmet fits. WE suggest getting a cap with ear flaps to keep you extra warm as we move from fall to winter.

A scarf is a versatile accessory that you can push up over your nose and cheeks if you start to feel cold, or loosen around your neck if you start to get overheated. Also, you’ll probably discover that your nose drips a lot more in cooler weather, so having a handkerchief or tissue easily accessible is key.

Torso

Layering your tops is essential to staying warm and comfortable while biking in cooler temperatures. Once you start feeling a little chilly while riding, it’s time to start wearing a polypro or merino wool base layer.

Your next layer should be a fleece tunic to add a layer of warmth to your upper body. You may want to consider investing in a softshell jacket, whose wind-blocking, water-repelling, breathability super powers goes a bit farther than just straight-up fleece to protect you from the weather. And when it starts to get really cold, you can wear both.

Hands

Keeping your hands warm is a must. Not only are cold hands uncomfortable, but have you ever noticed how your hands can seem weaker and slower to react when they’re cold? That’s not good when you need to squeeze your brakes at a moment’s notice to avoid a collision.

Which should you wear: gloves, mittens, or lobster gloves? This question always starts off a debate so just go with what works best for you. It’s most important to choose hand protection that is insulated. Finding hand coverings that let you use your touchscreen without removing them is a plus. And merino wool glove liners are your friend if you need a even more warmth.

Legs

Pulling on some merino wool tights or thermal leggings will make a big difference in how warm your legs feel while biking in colder weather. You can wear these under slacks or skirts, and you can wear more than one pair at once if you need more protection.

Feet

Similar to leggings, you’re going to want to go with layering merino wool socks to keep your feet warm. Several thermal layers will keep your toes toasty warm. Still not enough? Many cyclists swear by warming pouches that you can slip into your shoes (or gloves) to keep your extremities warm. A popular brand is “HotHands” which can be found in drugstores like CVS or in bulk on Amazon.

Keep in mind that different people have different thresholds for temperatures. You might find that you start donning extra layers much earlier or later than others. You might find that your fingertips get cold super fast and your toes overheat, while your best riding buddy experiences the reverse. It takes a little trial and error, but what’s important is finding out what works for you.

WE look forward to seeing you in the bike lanes this fall and winter!

Looking to buy a new bike? Here’s our advice!

By Meg Ausen

August may seem like an odd time to welcome a new bike into your family, but it’s actually the beginning of the “end of the season” (don’t worry! WE ride all year round!). If you are looking to buy new, August is when you will see current year models go on sale so that shops can bring in the next year’s stock. If you are looking to buy used, people might be off-loading a bike due to space or a desire to find a new steed. Below are some questions to ask yourself before purchasing and ideas to get you started!!

What size frame do I need?

While each bicycle manufacturer varies slightly, knowing the size of frame that’s right for your body is crucial when buying a new bike, especially if you are buying used and therefore do not have the option of test riding several different sizes at a shop. The primary measurement to determine the size you need is your pubic bone height – wearing shoes that you cycling in, measure the length from the base of your pubic bone to the base of your heel. This measurement will determine the size of frame that will fit you best as you can compare your height to the manufacturer’s inseam. Road bikes (whether new or classic) primarily use centimeters and mountain bikes primarily use inches.

You can make modifications on your bike on everything EXCEPT for the size of the frame (seat height, stem length, type of handlebars, etc). Having the right frame size will not only improve your comfort, but it will also be better for your body. Riding a lot on a bike that isn’t the right size can contribute to health problems.

What purpose will this bike serve?

If you have a very specific purpose in mind for you new bike, definitely gear your research and purchasing towards a bike that will meet that purpose. 

Commuting – functionality is a word that comes to mind when thinking of a commuter bike. Will you want to attach a rack(s) to the bike? If so, how much weight will you want to carry? Steel frames are better suited to carry a lot of weight versus aluminum frames. Will you be locking it up outside often? If your answer is yes and you are worried about bike thieves, the amount of money you want to invest in a commuter bike might change. Is your commute hilly? If you have some inclines, think about how many gears you’ll want. Are you more comfortable sitting upright or bent over? This can influence what type of handlebars you want.

You will likely be spending a lot of time on a commuter bike day in and day out, making any discomfort extremely noticeable. That said, you’ll definitely want a commuter bike that’s comfortable and durable. Steel bikes are great for commuting as they are super durable and weigh more, providing a sense of security when riding the pot-holed streets of New York City. Aluminum bikes are also great for commuting as they are light to carry up and down stairs (vital if you live in a walk up). 

Long rides – if you want a bike to zip around in the park or up along 9w, you will probably want a lighter bicycle with a medium to high number of gears. Typically, your crankset will have between one and three rings. The more rings you have, the more gears you have There is a lot of discussion among people looking to go fast about whether to have two or three rings as the extra ring adds weight. The number of gears you have is completely a personal preference, bud definitely something to keep in mind if you will be climbing a lot of hills on this bike. Most road bikes will have drop handlebars, but not all. If you want to use this bike primarily for laps or weekend rides, it’s not as important for these bikes to be extremely functional like a commuter bike.

Touring– similar to a commuter bike, you’ll want a bike that’s extremely functional for touring (I commute on the bike I got for a bike tour, so have doubled up on one bike serving two purposes). You’ll want a bike that can hold a lot of weight on racks and that is durable – think steel. 

Components and Accessories

If you are planning to buy new, use the shop where you are buying – that’s what they are there for! Ask them about saddles, brake systems, pedals, possible modifications, etc. If you are buying used, take into consideration the following:

Frame– is the frame dented, scratched, or rusted? Has it’s integrity been compromised in any way? Ask the current owner to describe the current condition as well as what type of riding they used the bike for. Did the current owner leave the bike outside often?

Tires/wheels – what is the condition of the tires? Look for good tread and that there are no cracks in the tubes. When test riding, take note of how smoothly the bike rides. If you feel wobbly or uneven, the wheel might be out of true which can be unsafe. 

Brakes – are the brake pads worn down? This is an easy fix, but riding with worn down brake pads can be dangerous as your stopping power is dramatically reduced.

Ask about when the bike last got a tune up. If it’s a vintage bike, ask whether the bike has EVER been tuned up while the seller has owned it. Obviously things wear down over time – it’s not uncommon for an older bike to be more susceptible to problems here or there if it hasn’t been regularly maintenanced throughout its life. For example, I once had a bike where the crankset needed a replacement after a bump I passed over caused the bottom bracket to break. Ask A LOT of questions!

And always, always, always test ride a bike you are planning to buy before buying it!

If you have any tips to share, join us in the conversation at the Female Bike Forum on Facebook!