Happy New Year from WE Bike NYC!!

By Meg Ausen

Bike Goals in 2016 – What do you want to do this year??

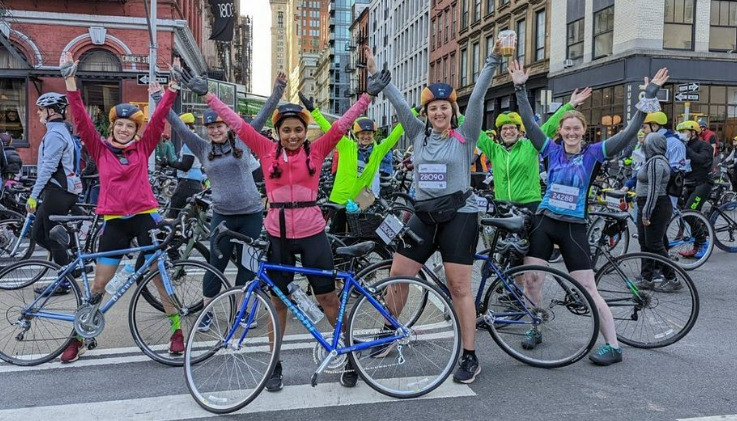
WE have rung in the New Year and cannot help thinking about what we want to accomplish over the next year. WE asked what are some bike goals you all have on our Female Bike Forum and here’s what WE found out. Thanks for your comments and ideas! If you have additional goals you would like to reach and are looking for ideas on how to reach them, let us know here!

Get a Feel for riding around New York City

Are you new to riding in New York City? You have found the right place for finding a community of women who bike and who will support you as you become more comfortable on the roads!! If you haven’t had the opportunity to ride with WE Bike NYC, now is the time! Seize the day! You can learn more about why women, female identifying and gender non-conforming people ride with WE Bike NYC here!

Ride Longer Distances

We heard from many seasoned city riders that a lot of you want to ride longer distances. Whether this is on an organized ride like a 100 mile century or a bike tour, many people have expressed the desire to take on more miles in 2016. Don’t know where exactly to start? WE have a lot of programming each year to help facilitate longer rides. Whether you are hoping to become more comfortable on highway 9w in New Jersey, looking to organize a group of friends to ride with at the NYC Century, or hoping to set out with a tent strapped on the back of your bicycle to take a multi-day bicycle tour, be sure to read our newsletter and check out our Facebook page for programming, tips and news related to riding long distances!

Climbing Hills

Biking around New York City’s five boroughs, WE have discovered that this city boasts its share of hills. WE all have ways of conquering these hills but it’s unclear whether many of us find this process enjoyable. Looking for ways to increase your power on your bike to help you up all of those hills (and bridges)?? Becoming better at climbing hills is unique to each of us, but physical and mental preparation are the two keys to success. Practice! Getting into the habit of climbing will automatically help you improve – WE aren’t saying you need to climb mountains for practice, just start small and build up your endurance. Practice either on our off your bike. Does your bike have gears? Having more gears allows our bodies to keep the cadence we maintain in low gears in higher gears. Try not to get discouraged and remember: if you keep pedaling you will eventually get there.

Go Clipless!

Many of you expressed the desire of going clipless on your bikes, or in other words, locking in to your pedals. This can seem daunting to do in New York City traffic. Clipless pedals are designed for cyclists to become more efficient by providing a better foot-to-pedal connection and safety by offering almost instant foot entry and release. Some top tips to help you get started: start with looser tension on the pedals allowing easier release for your feet (keep in mind that looser tension also means your shoes more easily unclip at all times) and try practicing clipping in and out of the pedals on soft surfaces in case you fall, like an empty filed at a park. Learn more about clips and other forms of foot retention here!

Biking in the Dark – choosing some good lights!!

By Meg Ausen


WE Bike NYC rides Cranksgiving!

Bike Lights – What’s the best for me?
As we lose more and more daylight during winter, our chances of riding in the dark increase greatly. If you haven’t already done so, now is definitely the time to check your bike lights and if needed get some new ones. Not only is it for your safety, but it is New York City law that bicyclists use a white headlight and a red taillight from dusk until dawn. Where to start? We’ve compiled some ideas below. Ultimately, you need to figure out what will be the best light for you based off of the types of roads you are riding, the amount of time you are riding in the dark, and your budget. As with most accessories related to our bicycles, ‘you get what you pay for’ applies to lights.

How bright of a light do I need – what’s a Lumen?

Brighter is always better. Most bike lights have different beam pattern settings allowing for a steady stream of light or a blinking strobe, providing cyclists different ways to be seen (both from oncoming traffic and from behind) and to see the path in front of them. Some claim that while a flashing light better grabs the attention of a driver to alert them that you are on the road, a steady stream of light can prove more useful to drivers for judging the distance they are from you and your bike. Remember to be mindful of how bright your front lights are to oncoming cyclists or pedestrians – a steady stream of light can be less aggravating then a strobe. Consider the roads you bike on when setting your beam pattern – if commuting primarily on streets with streetlights, choosing a front light with a narrow-focus beam should be sufficient. If you often ride along darker roads or trails, you will definitely want a wide-focus beam for better peripheral vision.

Nowadays, many light manufacturers measure by lumens. A lumen is a unit of measurement which quantifies the amount of light falling on the object you want to be illuminated. Lumens are measured at a uniform distance and describe the light intensity of each lighting unit. For example, one lumen is equivalent to the light of a candle one foot away. Most bike lights have a lumen rating (check the packaging or specs if purchasing online).

Check out this website for a visual of what different lumen intensities look like for front lights.

Front Lights: to be seen or to see? That is the Question

Actually, it’s best to both be seen by traffic and to be able to clearly see the road in front of you. As reviewed here, you can have both with lights like the Cygolite Dash 350. Basically, what this light does is combines a strobe with a steady beam, offering riders the best of both worlds. Priced at around $50, it also won’t break your budget and is rechargeable via a USB port. Here’s another useful website which offers a comparison of ranked lights based on cost, brightness, beam quality, battery life and portability.

Other great head lights:

Tail lights

The same website referenced above has reviewed and voted the Cygolite Hotshot Micro 30 as the best taillight that isn’t going to break your wallet. Testers sitting in the driver’s seat of a car found this light to be very visible due to its attention-getting flashing pattern and bright LED light. This light sells for around $30.

Other great taillights:

Other Factors to Consider when choosing lights

If you are using a rechargeable light, keep in mind the length of your commute and total riding time any given day. Take into consideration the battery life of your light so that you are always charged up and ready to go. Many lights have low-power modes which will extend the battery’s life between charging or for the battery-powered options, extend the life before your batteries go kaput. Strobe modes also tend to use less battery power than a constant beam of light.

If you have space, keep a set of emergency lights with you. These don’t need to be a second set of super bright lights described above, just some simple lights that will get you home if you have nothing else (think the free lights from Bike New York).

Other forms of Visibility

In addition to lights mounted to your bicycle, investing in reflective gear is always encouraged to make yourself more visible.

Have any bike light tips, questions, or just want to chat about bike stuff? Head over to our Female Bike Forum on Facebook!

**Products listed in this article are not endorsed by WE Bike NYC. Reviews were identified through Internet research.

Tips on Getting Ready for Bike Season!

By Meg Ausen

Happy March Everyone!With daylight savings around the corner and spring approaching, it’s likely that WE are all chomping at the bit to get back on our bikes after a cold and slippery winter. In preparation for hitting the pavement, WE have some ideas for exercises to prep your body for the upcoming cycling season. Remember to always be safe and if you have certain health issues, modify or avoid any exercises that will aggravate pain or cause injury. If you have any questions about how to perform any of the below exercises, it’s best to consult a health professional!

Core
Core strength is essential for cycling, particularly if you are riding longer distances. Your core creates the platform for pedaling, so working naturally having strong core muscles will translate into stronger pedaling. Not only will the following exercises strengthen your core, but you may see improved posture as another benefit – a strong core helps alleviate lower-back pain that is often associated with cycling. One of the pros behind these exercises is that you can do them from the comfort of you own home. For an added bonus, add some weights to your routine.

  • Planks – planking is one of the best movements a cyclist can do. Try side planking if you really want to make your core work.
  • Crunches – crunches target both your abdominals and your hip flexors.
  • Leg Raises – the benefits of leg raises are many – besides targeting and strengthening your core, leg raises work hip muscles, thigh muscles, quads and your back!

Legs

A no brainer, keeping your legs in shape is essential for having the strength to pedal yourself from point a to point b. Like the core exercises listed above, the following exercises can be performed from the comfort of your own home – no need for forking out the money for gym fees if you don’t want to!

  • Squats – squats are considered a powerful exercise for cyclists, targeting the hamstrings and glutes, some of the key muscles for strong cycling.
  • Lunges – targets many of the most important pedaling muscles, including the calves, hamstrings, and glutes. Mix it up by throwing reverse lunges into your routine.

Yoga

Try to introduce some yoga into your schedule. Aside from helping to alleviate stress (really important for New Yorkers!), yoga can be extremely beneficial to cyclists. Cyclists often have really tight hips, shoulders and hamstrings, and yoga can open those back up and correct some muscle imbalances.
If practicing at home, here are some recommended poses for cyclists

:

  • Cat/Cow – this pose brings length to your spine in both forward and back bends, working out stored tension from cycling.
  • Downward Dog – this pose will help to open your lower back simultaneously strengthening it, which will help provide structural support when you’re on your bike.
  • Chair Pose – this pose helps to both strengthen and open up your lower back and hips. It also helps to lengthen the upper spine.
  • Sacrum Stretch – this pose opens up the entire spine, particularly the sacrum which is located at the base of the spine.

If you want to pay for classes, the options for yoga studios in New York city are endless. Do some research for studios that suit your needs, but here are a few suggestions:

  • SYNC Studio – this is a joint cycling/yoga studio in Williamsburg.
  • Third Root Community Health Center – a community center in Brooklyn centered around social justice. Offers yoga and alternative medicine.
  • Yoga to the People – with locations all around New York City, this studio is a welcoming and affordable way to find out what type of yoga is right for you.

These exercises are helpful to us all year long, but building a routine as WE wait for spring will pay off when you are ready to get back on your bike for the upcoming season! Do you have any other ideas? Feel free to post them on WE Bike NYC’s Female Bike Forum!