Heat-related Illness: how to prevent, recognize and treat

By Meg Ausen

Long rides to the beach or up to Westchester are awesome summer NYC based rides. Upping the hours we’re in the sun also increases the possibility of overheating. We’ve probably all been there to some degree, but what can we do to avoid heat-related illness when biking? Below are some simple tips and advice on avoiding, recognizing, and treating both heat exhaustion and heat stroke. Peddle safe!

Avoiding Heat-Related Illness
According to several medical websites, ways to avoid heat-related illnesses include:

  • Wear loosefitting, lightweight, light-colored clothing. Remember: long sleeves do not always mean you will be hotter. If you have lightweight, wicking material, it might keep your body cooler than clothing with less material that leaves more of your skin exposed.
  • Avoid sunburn. Apply sun screen liberally (usually at least every two hours) and remember to apply it to places like your ears and your nose. Cycling caps also provide your face with some shade. Sunglasses are highly advised, too!
  • DRINK FLUIDS!!! Do not wait until you are thirsty to drink – drink often. Mix it up – add some electrolytes to your water or throw in a sports drink that has electrolytes. We sweat out a lot of salt when we exercise, so electrolyte replenishment is a must. Drinks with large amounts of sugar can cause a greater loss of body fluid. Avoid alcohol! Avoid coffee/caffeine if your body has difficulty retaining electrolytes.
  • Let your body acclimate to the heat – take breaks often in shaded areas (an ideal time to replenish fluids). Try to avoid doing all of your cycling during the high heat of the day. 

Recognizing if you have Heat Exhaustion or Heat Stroke
Not sure if what you are experiencing is a heat-related illness? WE aren’t doctors, so it’s best to consult a medical professional in the case you aren’t feeling well, but here are some symptoms:

Heat Exhaustion
There are two types of heat exhaustion; the first is caused by water depletion and signs include excessive thirst, weakness, headache, and loss of consciousness. The second is caused by salt depletion and signs include nausea and vomiting, muscle crams, and dizziness. Heat exhaustion isn’t as serious as heat stroke, but it is still serious. Without proper care, heat exhaustion can progress into heat stroke. Symptoms include:

  • Confusion
  • Dark-colored urine
  • Dizziness
  • Fainting
  • Fatigue
  • Headache
  • Muscle or abdominal cramps
  • Nausea, vomiting, or diarrhea
  • Pale skin
  • Profuse sweating
  • Rapid Heartbeat

Heat Stroke
Heat stroke is the most serious form of heat-related illness and is considered a medical emergency. If you suspect that you or someone else has heat stroke, call 911 immediately and administer first aid until paramedics arrive. Heat stroke can kill or cause damage to the brain and other internal organs. It often occurs as a progression from milder heat-related illnesses such as heat cramps, heat induced fainting, and heat exhaustion. However, it can occur even if there are no previous signs of heat-related illness. Symptoms include:

  • One of the core symptoms includes a core body temperature above 105 degrees Fahrenheit, although fainting may also be the first sign.
  • Throbbing headache
  • Dizziness and light-headedness
  • Lack of sweating despite the heat
  • Red, hot, and dry skin
  • Muscle weakness or cramps
  • Nausea and vomiting
  • Rapid heartbeat, which may be either strong or weak
  • Rapid, shallow breathing
  • Behavioral changes such as confusion, disorientation, or staggering
  • Seizures
  • Unconsciousness

Treatment
If you or anyone, or anyone else, has symptoms of heat exhaustion, it’s essential to immediately get out of the heat and rest, ideally in an air-conditioned space. Or, if outside, seek out the nearest cool and shady spot. Other recommendations include: drink lots of fluids (avoid caffeine and alcohol); remove any tight or unnecessary clothing; take a cool shower or bath; apply other cooling methods like fans or wet/ice towels.

If you, or anyone else, has been exposed to heat stroke, call 911 immediately or transport the person to a hospital (but not by bike!!). Any delay of treatment makes the complications worse and can prove fatal. While waiting for paramedics to arrive, initiate first aid. Move the person to an air-conditioned space, or if outside to a cool and shady area. Remove any unnecessary/tight fitting clothing. If possible, take the person’s core body temperature and initiate first aid to cool it to 101 or 102 degrees Fahrenheit. If no thermometer is available, don’t hesitate to administer first aid. Steps include: fanning air over the individual while wetting their skin with water; applying ice packs to the individual’s armpits, groin, neck, and back (these areas are rich with blood vessels that are close to the skin and cooling them may reduce body temperature; immerse the individual in a shower or tub of cool water, or an ice bath. 

If you have been exposed to heat-related illness, it is best to avoid high temperatures during the following week or so since your body will likely be more sensitive to the heat. Talk to your doctor about when to resume normal activities.

Again, WE are not medical professionals, so we advise that if you suspect that you or someone around you is experiencing a heat related illness to seek medical help immediately. Biking (or any athletic activity outdoors) during the summer provides some of the best fun you can have in New York City. Approach the heat right and stay healthy – if you know are susceptible to heat-related illnesses there is no shame in taking it easy! If that’s the case, beat the heat at a movie and treat yourself to some popcorn 🙂
Tips on Locking up your Bike

While the colder months mean less people are out on the streets riding, it doesn’t mean that bike thieves aren’t out, looking for their next score.

Some bikes are more appealing to bike thieves than others, but regardless of what you ride, it’s always a good idea to make sure your bike is as properly locked up as much as possible. Bike theft can happen to anyone, anywhere, even if your bike is pristinely locked up. No one wants to feel their heart drop into their stomachs when they realize their bike has been stolen, but you can take steps to at least deter bike thieves from taking your bike in the first place.

Bike thievery is often a crime of convenience, so here are some ways to make your bike less convenient for a bike thief to steal:

Make sure all parts that can be removed through a Quick Release feature (i.e. seat clamps and wheel skewers) are secure. That may mean using two or more locks, removing your front wheel and locking it to your back wheel, or using locking skewers for your wheels and seat clamps. For seats, you can also ask your local bike shop to fashion a chain out of a used bike chain and inner tube to prevent someone from stealing your seat and seat post.

Use heavy duty locks like U-Locks or chain locks. Cable locks are easy to cut and if you only use a cable lock to secure your bike, your bike becomes an easy target. While the thicker U-Locks and chains are heavier to carry, they are harder to break through.

For U-Locks, lock the frame to a stable pole or bike rack using the down tube. For chain locks, try to wrap the chain around as many parts of the bike as possible and wrap it close to the bike.

When locking your bike outside, try for a well-lit space with some foot traffic. When locking to a pole or a bike rack, wiggle the object first to make sure it is securely attached to the ground before locking it up. And remember that it’s perfectly okay to run outside for a quick minute to peek at your bike and make sure it’s still there and that no one is fidgeting with it … do what you need to do to feel comfortable about locking your bike up outside.

PLEASE NOTE! These tips are just that: tips. WE cannot guarantee that if you follow these tips that your bike will be completely safe and will never be stolen when locked up outside.

And if you have any tips to share, join us in the conversation at the Female Bike Forum on Facebook!

Biking in the Dark – choosing some good lights!!

By Meg Ausen


WE Bike NYC rides Cranksgiving!

Bike Lights – What’s the best for me?
As we lose more and more daylight during winter, our chances of riding in the dark increase greatly. If you haven’t already done so, now is definitely the time to check your bike lights and if needed get some new ones. Not only is it for your safety, but it is New York City law that bicyclists use a white headlight and a red taillight from dusk until dawn. Where to start? We’ve compiled some ideas below. Ultimately, you need to figure out what will be the best light for you based off of the types of roads you are riding, the amount of time you are riding in the dark, and your budget. As with most accessories related to our bicycles, ‘you get what you pay for’ applies to lights.

How bright of a light do I need – what’s a Lumen?

Brighter is always better. Most bike lights have different beam pattern settings allowing for a steady stream of light or a blinking strobe, providing cyclists different ways to be seen (both from oncoming traffic and from behind) and to see the path in front of them. Some claim that while a flashing light better grabs the attention of a driver to alert them that you are on the road, a steady stream of light can prove more useful to drivers for judging the distance they are from you and your bike. Remember to be mindful of how bright your front lights are to oncoming cyclists or pedestrians – a steady stream of light can be less aggravating then a strobe. Consider the roads you bike on when setting your beam pattern – if commuting primarily on streets with streetlights, choosing a front light with a narrow-focus beam should be sufficient. If you often ride along darker roads or trails, you will definitely want a wide-focus beam for better peripheral vision.

Nowadays, many light manufacturers measure by lumens. A lumen is a unit of measurement which quantifies the amount of light falling on the object you want to be illuminated. Lumens are measured at a uniform distance and describe the light intensity of each lighting unit. For example, one lumen is equivalent to the light of a candle one foot away. Most bike lights have a lumen rating (check the packaging or specs if purchasing online).

Check out this website for a visual of what different lumen intensities look like for front lights.

Front Lights: to be seen or to see? That is the Question

Actually, it’s best to both be seen by traffic and to be able to clearly see the road in front of you. As reviewed here, you can have both with lights like the Cygolite Dash 350. Basically, what this light does is combines a strobe with a steady beam, offering riders the best of both worlds. Priced at around $50, it also won’t break your budget and is rechargeable via a USB port. Here’s another useful website which offers a comparison of ranked lights based on cost, brightness, beam quality, battery life and portability.

Other great head lights:

Tail lights

The same website referenced above has reviewed and voted the Cygolite Hotshot Micro 30 as the best taillight that isn’t going to break your wallet. Testers sitting in the driver’s seat of a car found this light to be very visible due to its attention-getting flashing pattern and bright LED light. This light sells for around $30.

Other great taillights:

Other Factors to Consider when choosing lights

If you are using a rechargeable light, keep in mind the length of your commute and total riding time any given day. Take into consideration the battery life of your light so that you are always charged up and ready to go. Many lights have low-power modes which will extend the battery’s life between charging or for the battery-powered options, extend the life before your batteries go kaput. Strobe modes also tend to use less battery power than a constant beam of light.

If you have space, keep a set of emergency lights with you. These don’t need to be a second set of super bright lights described above, just some simple lights that will get you home if you have nothing else (think the free lights from Bike New York).

Other forms of Visibility

In addition to lights mounted to your bicycle, investing in reflective gear is always encouraged to make yourself more visible.

Have any bike light tips, questions, or just want to chat about bike stuff? Head over to our Female Bike Forum on Facebook!

**Products listed in this article are not endorsed by WE Bike NYC. Reviews were identified through Internet research.

Cold Weather Tips from WE Bike NYC!!

Biking in Snow

We have now entered daylight savings time, an official indicator that shorter days and colder temperatures are right around the corner. Bummed about putting your bike away just yet? Do you want to continue to ride as the weather gets colder but aren’t sure where to start? WE Bike NYC and Black Girls Do Bike presented a cold weather clinic in October with the main takeaways below. Special thanks to Casey Ashenhurst and Courtney Williams, spokeswomen of WE Bike NYC and Black Girls Do Bike: NYC, for organizing the clinic!

First Thing’s First – How to Dress?

For obvious reasons, wearing the right materials is the first step in staying warm, avoiding discomfort, or worse, danger such as hypothermia. Stay dry to stay warm!! The basic formula for cold weather dress is: moisture wicking layer + warm layer + wind/weatherproof layer. Moisture wicking fabric pulls moisture from the body to the exterior of the shirt where it can evaporate more easily, preventing body heat loss. Avoid cotton at all costs – instead turn to wool or synthetic fabrics. When determining outer layers, remember the difference in water-resistant (endures only a bit of water) versus waterproof (endures heavy precipitation). Windproof and weatherproof garments should be either breathable or vented to allow moisture from your bottom layers to escape and help with body temperature regulation.

Like most things bike-related, figuring out what combination works best is personal. Take some time to figure this out before a very cold day when you will be riding:

  • Go for a ten minute ride in your combination of choice to see if it remains comfortable after your body heats up.
  • If you step outside and are already warm, you probably want to take off on layer.
  • As you experiment, take a backup layer with you to add on if necessary. Alternatively, carry a bag to hold any layers that need to come off.
  • Try making a gear log of what worked best for you in different riding conditions to be better prepared.
  • Don’t layer too heavily – you still want dexterity in your fingers and flexibility in limbs to shift gears and pedal.

Remember! Staying warm in the cold doesn’t mean you need to go buy all new gear! Work and experiment with what you already own, taking note of what essentials you need to invest in. Take mind of your extremities as these are generally the most susceptible parts of our bodies to suffer from the cold – use glove liners, full finger thermal gloves and/or lobster claw gloves to keep your fingers and hands warm and tall socks (preferably wool) and/or shoe covers for your toes and feet.

What about my Bike? How does it Operate Differently?

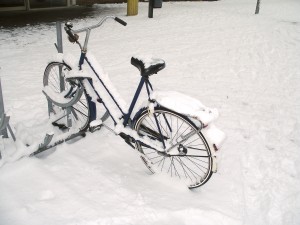
Winter in New York City is rough on bikes – the snow, and particularly the salt, take a toll on our bikes. Keep this in mind when deciding when and how often to ride as well as which bike you should ride if you have multiple. The salt on the roads is particularly corrosive to bicycle frames, so make sure to clean your bike more often during the winter to avoid maintenance issues.

Winter streets can be brutal – wetness, snow, and possible ice increase the chances of taking a spill. Lower the PSI in your tires to the suggested minimum PSI (this number can be found on your tire’s sidewall), as this helps increase surface area between tire and pavement. If you prefer, switch out your tires for winter tires. Clean your chain more often as the slush and dirt can cause seizing. When on the road, slow down – it’s hard to know what lays ahead on snowy, wet roads, so exercising caution is to your advantage. Brake earlier and avoid metal pieces of infrastructure as these become slippery. Use caution going over bridges as they become icy faster than the rest of the roads. If you are wondering what the road conditions are, check local bike forums for update. Most importantly, keep safety your number one priority!! No one likes a jam packed subway train, but if that is the safer option, there is no shame in taking the train.

Nutrition

It’s easy to think avoid drinking and eating properly in cold weather, but this is a mistake. Our bodies are burning more calories just to stay warm. Add the additional loss of calories from biking, and this translates into a greater need to replenish. Drinking cold water isn’t fun when it’s cold outside – try insulated water bottles and warm water. If you have any issues with the mouthpiece of your water bottle freezing shut, try tipping it upside down in its cage to prevent freezing.

Visibility

Now that we have fewer hours of daylight, the chances of you riding in the dark increases in cold weather. Now is a good time to check your lights and possibly invest in a few more. Keep an extra set of batteries in your pocket in case your lights go dim while out on the road. Reflective outerwear is also a good idea.

Alternative Training

If you prefer to avoid cold weather riding altogether, there are plenty of alternatives to not losing your endurance built up over the summer – join a gym, take spin classes, or get a bike trainer are just a few of the options cyclists have to maintain their endurance over the cold, dark winter.

Overall, remember to stay safe – if you are miserable on your bike in cold weather or unsure about your safety, there is no shame in finding another mode of transportation until you are able to bring your bike out again in the spring. Additional tips on cold weather riding can be found here.